Blunders and dangerous squares
Most junior games are decided by a piece given away, not by a plan. Here is how to stop doing it.
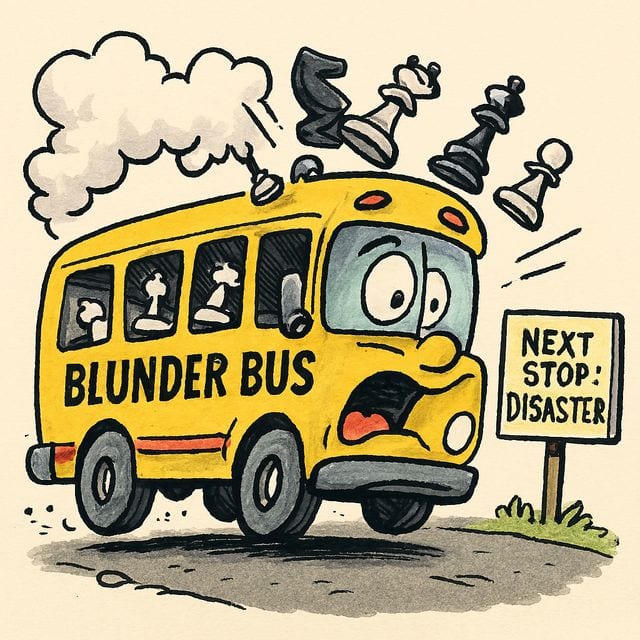
If you’re on the Blunder Bus, get off at the next stop and follow these principles.
Too many games are lost because you made a blunder, and too many are won because your opponent made one.
Would you cross the road without looking both ways? Apply that same principle to your chess. The most important move in every chess game is the last move your opponent made; the second most important is your next one.
Blunders are obvious mistakes that should be avoidable with a basic understanding of chess. Trading a knight for a pawn without gaining any strategic advantage is a clear blunder.
There are two types: losing a piece unnecessarily, and missing an opportunity to capture an opponent’s piece. Most games, especially those played by beginners, are won or lost on them.
Sit on your hands and ask yourself: why did my opponent make that move, and what are they attacking? Every time your opponent moves, work out their intention and what piece — if any — they are threatening. Do that and you will defend or move the threatened piece instead of losing it.
Example 1
After Black played Na5, White moved the knight on c3 to e2 without realising the bishop was under attack — a significant blunder. If they had asked themselves why their opponent moved that knight, they would have seen the threat and responded.
Example 2
Black moves the queen to attack the f2 pawn, thinking it is protected by the knight — but forgets that the queen was the piece protecting that knight. Now White’s queen simply takes it.
So look both ways
By applying these two checks and not moving too quickly — analysing your opponent’s moves and making sure your own pieces are safe — you can cut out most blunders. Don’t ‘cross the road’ without looking.
- Check your opponent’s last move. Understand its purpose, and work out whether it attacks or threatens anything.
- Check kings and queens. Is your king in danger of checkmate? Do you have a checkmate on theirs? Is either queen under threat of capture?
- Check rooks, knights and bishops. Look at yours for captures and threats against them, and look at theirs for anything you can take.
Remember T.R.I.P.
When one of your pieces is attacked, there are four things to look for, and T.R.I.P. is how to remember them.
- Take — can I take the attacking piece?
- Run — can I run away, or advance a pawn?
- Interpose or block — can I put a piece in the way?
- Protect — can I protect my piece in any way?
T.R.I.P. on a real position
Black to move. White’s knight has arrived on d5 and it is attacking the pawn on b6. Run through the four questions in order:
- Take? Can I take the attacking piece — yes. The bishop on f7 covers d5.
- Run? Can the attacked pawn run — no. A white pawn is sitting on b5, so b6 has nowhere to go.
- Interpose? Can I block the attack — no. You can never block a knight.
- Protect? Can I defend the pawn — no. Nothing reaches b6; the bishop is on the wrong colour squares.
Three noes and one yes, so the answer picks itself: bishop takes knight.
Landmines and ticking bombs
The theme here is being careful where you put your pieces. We lose games because we don’t pay enough attention to the dangerous squares we move pieces on to — so let’s call them landmines and ticking bombs.
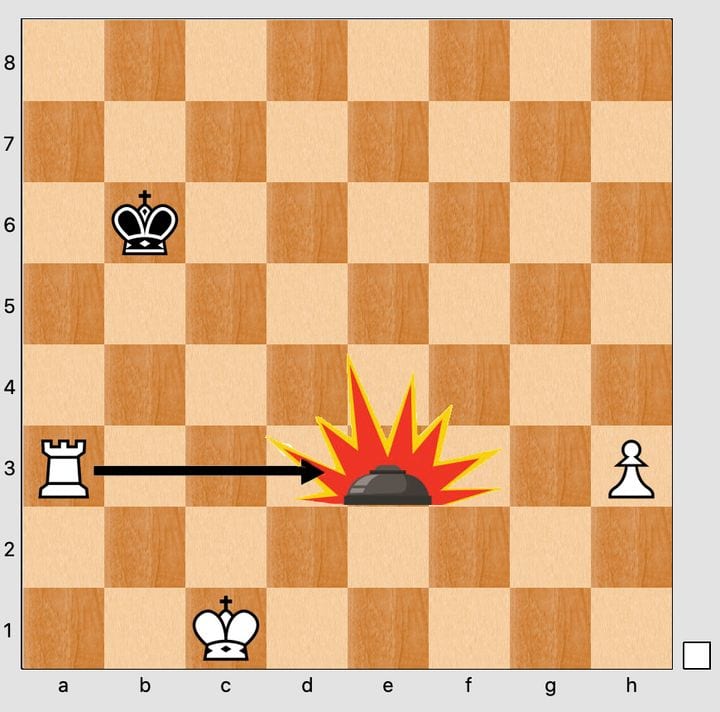
What is a landmine? A square that is protected, and explosive to tread on — in other words, losing a piece for free.
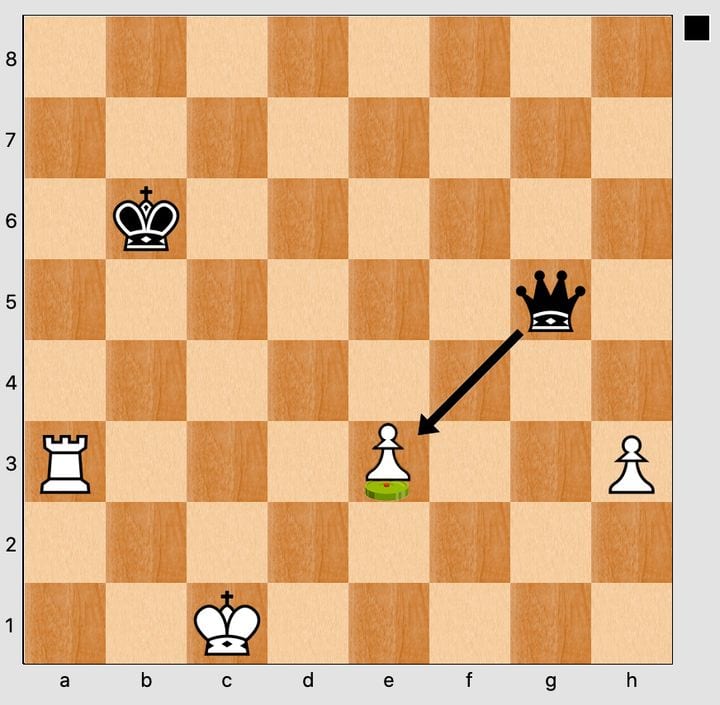
The queen is lining up to take the pawn on e3 with check, but doesn’t notice that it is sat on a landmine — it is protected by the rook — and blindly takes it anyway.
Unprotected squares
These can be equally dangerous. Putting a piece on an unprotected square invites an attack that may cost you the piece, so think twice before doing it.
A ticking bomb marks a dangerous square to sit on: either it is unprotected, or it has more attackers than defenders. Look at this example.
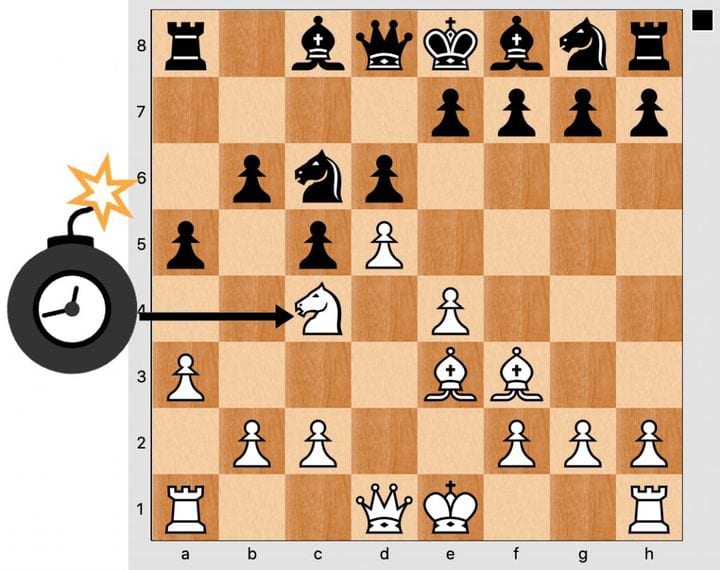
White’s knight sits happily on c4 but is not protected — it is sitting on a time bomb. If Black attacks it with the bishop to a6, say, White has to do something about it: protect the knight, or move it.
Your turn
Solving puzzles is something that will help your game, it also gives you plenty of time to think.
This example is a typical tactic during the opening stages, see if you can spot it. The White Knight has just taken the Black Knight on d4, what is Black’s best reply to win a piece?
The answer is Qxd4+, and it works because nothing of White’s defends that knight. The bishop on c4 is on light squares and d4 is dark, the knight on c3 does not reach it, and the queen on d1 is shut in behind her own pawn.
The check is what makes it clean. From d4 the queen also looks down the empty diagonal to White’s king on g1, so White has to deal with the check at once and never gets the move it would need to punish the queen. A piece on a square nothing defends is not safe just because it looks comfortable.
The art of exchanges
Before you exchange pieces, count how many pieces attack and how many defend. If the count is in your favour, work out which sequence is best — usually start with the lower value pieces and work up to the highest last.
Here are three goes at the same position, showing different ways to exchange and what the outcomes are. Play them through and compare what is left on the board at the end.
1. Bxd5  Nxd5  2. Rxd5  Rxd5  3. Qxd5  Qxd5  4. Rxd5
              White is a pawn up
          1–0
1. Rxd5  Nxd5  2. Rxd5  Rxd5  3. Bxd5
              Black is the exchange up
          0–1
1. Bxd5  Qxd5  2. Rxd5  Rxd5  3. Rxd5  Nxd5  4. Qxd5
              White has a Queen v Rook
          1–0
Same pieces, same squares, three different results. That is why the order is worth a few seconds’ thought.